If you love painting and want to explore new techniques, the wet-on-wet technique with acrylic colors is an exciting skill to master. As an artist with over 7+ years of experience, I can tell you this technique adds beautiful softness and fluidity to your paintings, allowing colors to blend naturally and create stunning effects.
In this blog, I’ll explain what wet-on-wet means, how you can do it with acrylics, and the best places to use this technique. Whether you are a beginner or an experienced painter, you’ll find helpful tips and steps to create your own beautiful artworks.
What Is the Wet-on-Wet Technique?
The wet-on-wet technique (also called "alla prima") means applying wet paint onto an already wet surface. This allows the colors to mix and flow into each other directly on the canvas, creating soft, blended edges and smooth transitions.
While wet-on-wet is a classic oil painting method, acrylics dry much faster. So, to do wet-on-wet with acrylics, you need some tricks to keep the paint wet longer and work quickly.

Why Use Wet-on-Wet with Acrylics?
-
Smooth color blending: Perfect for skies, water, and soft backgrounds.
-
Speed: Finish parts of your painting in one session.
-
Expressive style: Let colors mix naturally for a lively, fresh look.
-
Easy corrections: You can rework the paint while it’s still wet.
What You Need to Get Started
-
Acrylic paints (choose artist or student quality).
-
Slow-drying medium or acrylic retarder: This helps slow down drying time.
-
Canvas or acrylic paper (preferably with a smooth, low-absorbent surface).
-
Brushes: Flat or filbert brushes work well for blending.
-
Palette and water container for cleaning brushes.
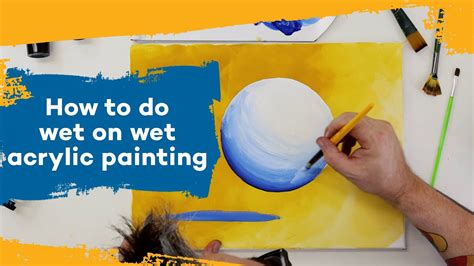
Step-by-Step Guide to Wet-on-Wet Acrylic Painting
Step 1: Prepare Your Surface
Start by applying a thin wash of diluted paint or a slow-dry medium on your canvas to keep it moist. This gives you a wet base to work on and helps your colors blend easily.
Step 2: Arrange Your Colors
Squeeze your paints and mediums onto the palette in the order you plan to use them. Keep your brushes and water ready because you’ll need to work fairly fast.
Step 3: Apply Paint Quickly
Start painting your background or large areas using broad strokes. Since the surface is wet, your colors will mix naturally when applied close to each other.
Step 4: Blend the Colors
Use a clean, damp brush or palette knife to softly blend edges while the paint is still wet. Avoid over-brushing, as it can muddy your colors.
Step 5: Add Details
Once the main colors are blended but still wet, you can add smaller details like trees, clouds, or highlights. Use a drier brush for sharper edges here.
Step 6: Let It Dry
Acrylics dry faster than oils. Using a slow-dry medium can give you about 30–60 minutes of workable time. If the paint starts drying, you can lightly mist it with water to reactivate the surface.
Where to Use Wet-on-Wet Acrylic Technique
1. Landscapes
Create soft skies, flowing water, or misty backgrounds with smooth color transitions. Wet-on-wet is perfect for natural scenes requiring gradual blending.
2. Clouds and Weather Effects
Blend whites, greys, and blues effortlessly to paint realistic or dreamy clouds and atmospheric effects.
3. Abstract Art
Use this technique to let colors flow and merge freely for dynamic, vibrant compositions.
4. Florals and Soft Subjects
Paint flowers or foliage with gentle gradients and soft edges that give a natural, delicate look.
Pro Tips for Better Wet-on-Wet Acrylic Paintings
-
Use a slow-drying medium like Golden Open Acrylics or an acrylic retarder to extend working time.
-
Choose a smooth, low-absorbent canvas or paper to keep paint wet longer.
-
Work quickly but confidently—have your palette and brushes ready before starting.
-
Avoid adding too much water after the base; it can dilute the paint and reduce color intensity.
-
Practice blending by experimenting with different brushes and strokes.
Final Thoughts
The wet-on-wet technique with acrylic paints opens up new creative possibilities by allowing soft blends and quick finishes. With just a few materials and a little practice, you can add softness, mood, and expressiveness to your artwork.
Try this technique on your next painting and enjoy the fun of colors flowing and mixing naturally on your canvas. Happy painting!
If you want more tips on acrylic painting or other art techniques, keep following this blog!